Call Us
(813) 440-8108

Cleaning your HVAC blower motor is essential for maintaining efficient system operation and ensuring good air quality. Dust and debris can accumulate on the blower motor over time, reducing its performance and leading to increased energy consumption. Regular cleaning can extend the lifespan of your blower motor and improve your HVAC system's efficiency.
In this article, we will provide a detailed guide on how to clean your HVAC blower motor. We'll cover the necessary tools, safety precautions, and step-by-step instructions to help you perform this task effectively.
Before beginning, ensure that the power to your HVAC system is turned off at the circuit breaker. Wear insulated gloves and safety goggles to protect yourself from electrical shocks and debris. Follow the safety instructions provided in your HVAC system's manual.
👉🏻 Read More: How to Test Your HVAC Blower Motor: A Step-by-Step Guide
Locate the blower motor within your HVAC system. This is typically found behind the access panel. Use a screwdriver to remove the panel and expose the blower motor and its wiring.
Using a vacuum cleaner with a hose attachment, carefully remove any loose dust and debris from around the blower motor. Be gentle to avoid damaging any components.
Use a soft brush to remove dust and dirt from the blower motor's exterior. For more thorough cleaning, use a canister of compressed air to blow dust out of hard-to-reach areas. Avoid using excessive force to prevent damage.
Remanufactured Motor by United HVAC Motors
2 Year Replacement Warranty (Terms Apply)
Plug n Play - 100% Programmed
Match your Motor Model N...
Remanufactured Motor by United HVAC Motors
2 Year Replacement Warranty (Terms Apply)
Plug n Play - 100% Programmed
Match your Motor Model N...
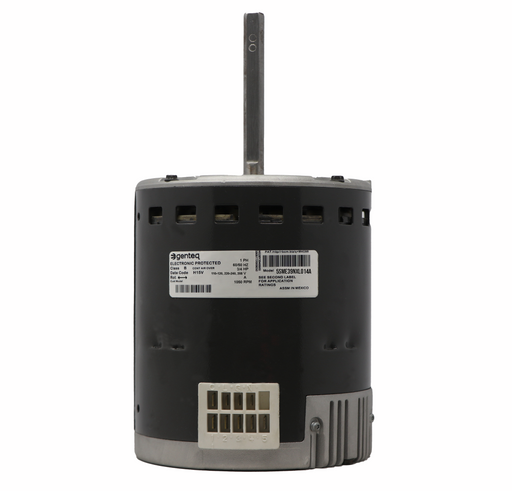
5SME39NXL014A GE Genteq Blower Motor ECM X13 3/4 HP
Original price
$329.99
-
Original price
$329.99
Original price
$329.99
$329.99
-
$329.99
Current price
$329.99
In stock
Original price
$329.99
-
Original price
$329.99
Original price
$329.99
$329.99
-
$329.99
Current price
$329.99
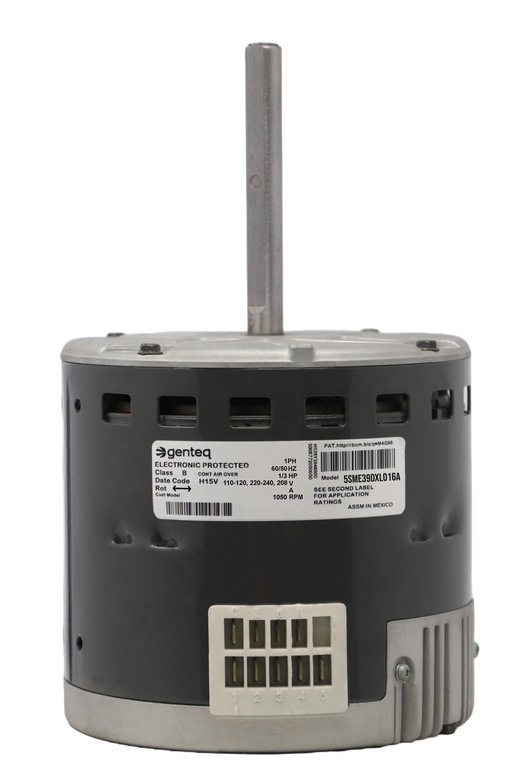
5SME39NXL178 GE Genteq Blower Motor ECM X13 3/4 HP
Original price
$329.99
-
Original price
$329.99
Original price
$329.99
$329.99
-
$329.99
Current price
$329.99
In stock
Original price
$329.99
-
Original price
$329.99
Original price
$329.99
$329.99
-
$329.99
Current price
$329.99

The fan blades of the blower motor can also accumulate dust and dirt. Use a soft brush or a cloth dampened with a mild detergent to clean the blades. Wipe them dry with a clean cloth to prevent rust or corrosion.
Inspect the blower motor for any signs of wear or damage. Some blower motors may have lubrication points. If yours does, apply a few drops of appropriate lubricant to keep the motor running smoothly.
After cleaning, reassemble the blower motor and replace the access panel. Turn the power back on and test the HVAC system to ensure the blower motor operates efficiently. Listen for any unusual noises and check for proper airflow.
Regular cleaning can prevent excessive dust buildup, which can cause motor strain.
If the motor makes unusual noises after cleaning, recheck the fan blades and motor for debris or misalignment.
Ensure that all parts are properly reassembled and the motor is running smoothly.
👉🏻 Read More: Where is Your HVAC Blower Motor Located? - Detailed Guide
Regularly cleaning your HVAC blower motor can significantly improve system efficiency and air quality. By following this guide, you can maintain your blower motor and ensure your HVAC system operates at its best.
Visit our website to explore our selection of remanufactured blower motors, perfect for enhancing your HVAC system's performance.
Remanufactured Motor by United HVAC Motors 2 Year Replacement Warranty (Terms Apply) Plug n Play - 100% Programmed Match your Motor Model N...
View full detailsRemanufactured Motor by United HVAC Motors 2 Year Replacement Warranty (Terms Apply) Plug n Play - 100% Programmed Match your Motor Model N...
View full details